


From the launch of Centreon 18.10 onwards, we started using the React JavaScript library in order to make our user interface more enjoyable and dynamic. We first redesigned the “Top Counters”, providing an overview of the Resources status (in the header of the web application). Then we migrated the Extension Manager page, in which you can manage your modules and your widgets. So far, we have implemented other pages using React, like Business Activities and Business Views pages, the Auto-Discovery pages and, finally, the Resources Status page, which replaces all of the existing monitoring pages (available since the 20.04 version).
With this blog post, we provide an insider’s view into our experience in developing and optimizing our web application’s front end, sharing our thought process and technological choices in building a more enjoyable interface.
Why React?
Let’s start with our choice to use React. React is a JavaScript UI library that allows you to build Single Page Application (SPA) with dynamic renders related to user interactions. With React every part of your application is a component. That means each component you develop renders one or several elements of your web application with a business logic to dynamically update the component display. Components are arranged as an organizational hierarchy which means that a component can render one or more child components. React is easy to use and easy to learn, flexible, and it comes with strong community support and a great ecosystem.
Our reasons for optimization: usability and speed
As Centreon Web grows, we need to add new features, as well as enhance those that exist. We were pretty busy with the Resources Status and Host Discovery pages during the last versions. We added and improved plenty of features (your feedback helped! :))
Nevertheless, adding some complexity also comes with an increase in memory consumption if nothing is done to optimize it. Application fluidity is important and so is providing user feedback as quickly as possible to keep them focused within the application. The Doherty threshold law states that the UI must deliver user feedback at 400 milliseconds after they interact with the interface.
The primary goal is usability that is as smooth as possible, and swift updates to our React components when a user interacts with the application or when the application is receiving data from the API.
To do that, we first listed the pages impacted by the optimization: Resources Status, Host Discovery, Business Activities and Business Views.
Then, we assigned some simple use case scenarios for each page that could impact web application performances:
| Page | Scenarios |
| Resources Status |
|
| Host Discovery |
|
| Business Activities |
|
| Business Views |
|
Then, we measured the components that were expensive to update. To do this, we used the React Devtools. This is an extension available on Chrome and Firefox that displays when a React application is detected by adding two tabs in the browser’s console:

React Devtools tabs
The first tab named “Components” displays a tree structure of your components currently displayed. The second one is a Profiler. Like the Performance tab, it profiles your React components by displaying a “flame graph” for each render committed by the components:
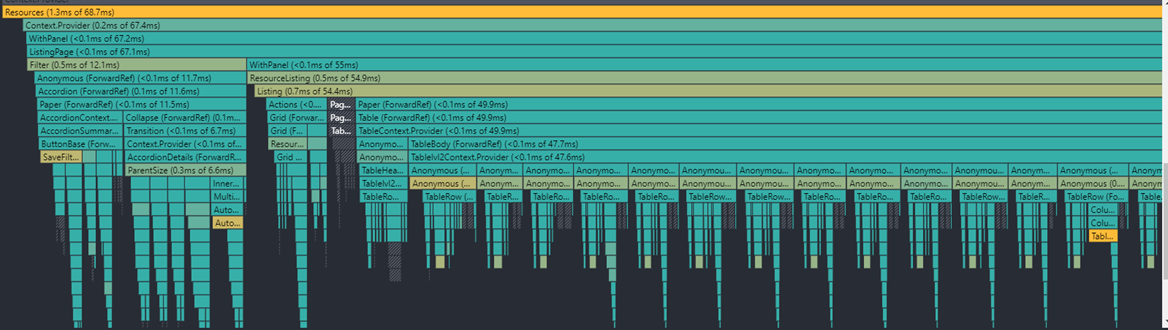
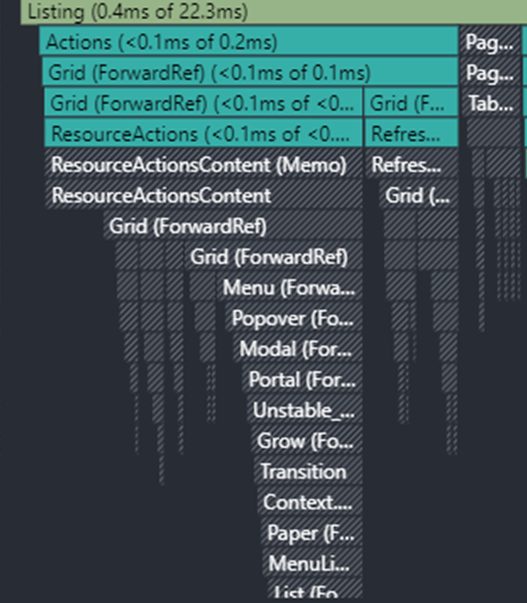
Example of flame graph when the Resource listing is refreshed
How do we read this graph? Each chunk is a React component and all of them are hierarchized. The gray color means a component is not rendered in the display while the colored components are rendered. The more the color tends towards orange, the more the component is expensive thus, the more the time it takes to render. The profiler computes the overall render time of all the child components for each parent component.
With React, when a component is rendered, it triggers a recursive render for all of his children. The downside of this is that some components are rendered even when they are not updated graphically. Therefore, we should not render them to spare wasteful updates.
The state management at the origin of the update of the components
There are two types of state management in React. The first one consists of handling states within our components. We can use hooks such as useState provided by the React API.
This hook allows us to handle a state and update the component display or the behavior of the application.
Example of React useState hook usage
A state can be a number, a string, a boolean, an object or an array.
We can also pass some data from a component to his own children through properties.
Example of use of properties passing
The other type of state management is to manage it in a global way. It is very handy when component architecture is complex and when we want to share the state across multiple components. It avoids creating a chain of properties passing throughout the components tree, which impacts the code readability negatively.
There are a lot of libraries that allow us to achieve global state management, such as Redux, but in our case, we use the Context API from React that is easier to use than Redux.
Indeed, we need three simple steps to create and use a React Context. First, we create our Context:

Context creation
Then, we integrate our Context in a component, preferably the highest component in the hierarchy.
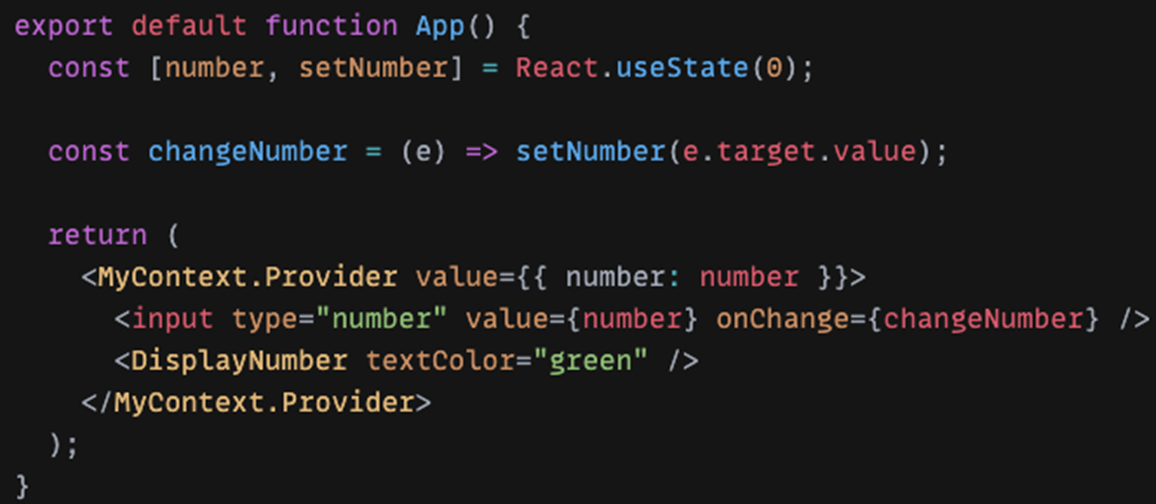
Component implementing a Context using the building
Finally, we use the Context to handle our state in our child components.

Component using a Context
In the Resource status page, we use the Context API to handle filters, store the resources listing for the Resources Status, store user parameters or trigger a request to the API to retrieve the resources and a lot more. That allowed us to increase the code readability, and make it easier for us to extend it.
Unfortunately, when a state is updated, every component linked to it via the global Context is updated even if some of them are not using the updated state. That causes useless renders; therefore, the application will be slower to respond to the user interaction.
The solution is memoization
To make things run faster, we introduced memoization. In short, memoization is an optimization technique that stores in the cache the outcome of an expensive function and uses that stored result when the inputs are not updated.
With React, we can memoize the result of a function but we can also memoize the component using the function memo provided by the React API.
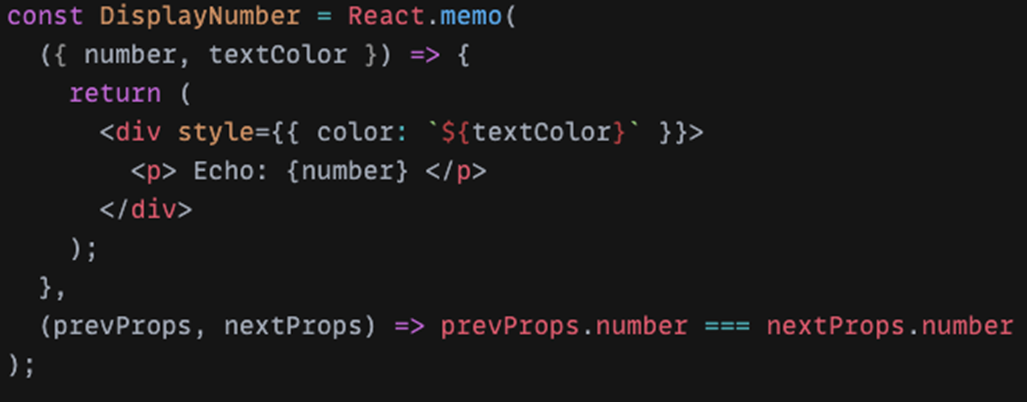
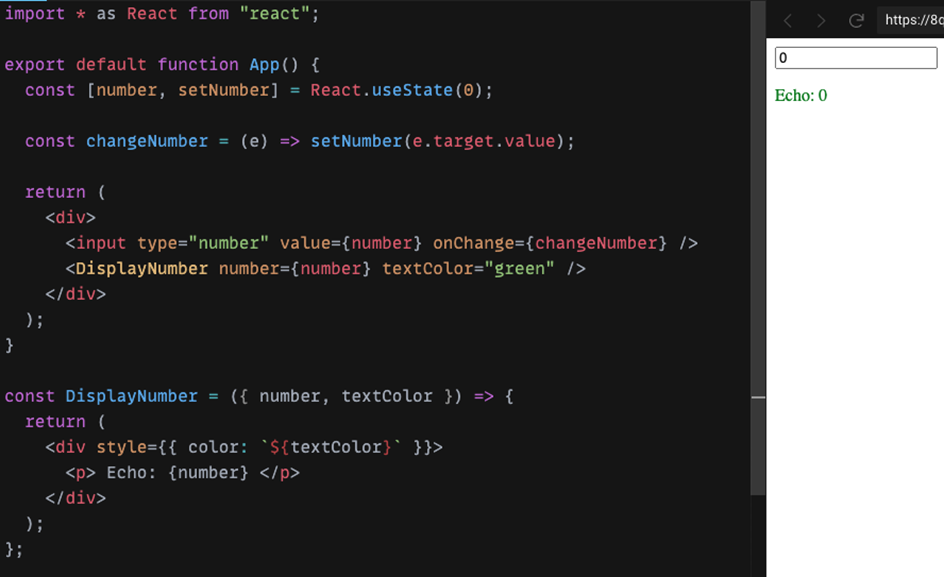
DisplayNumber component is memoized
In the above example, we are memoizing the component DisplayNumber to render only when the property number is updated.
In our case, we wanted to industrialize the component memoization to apply it easily in our components. We created a custom hook named useMemoComponent that takes two inputs. The first one is the component to memoize and the second one is an array of properties taken into account during the memoization.
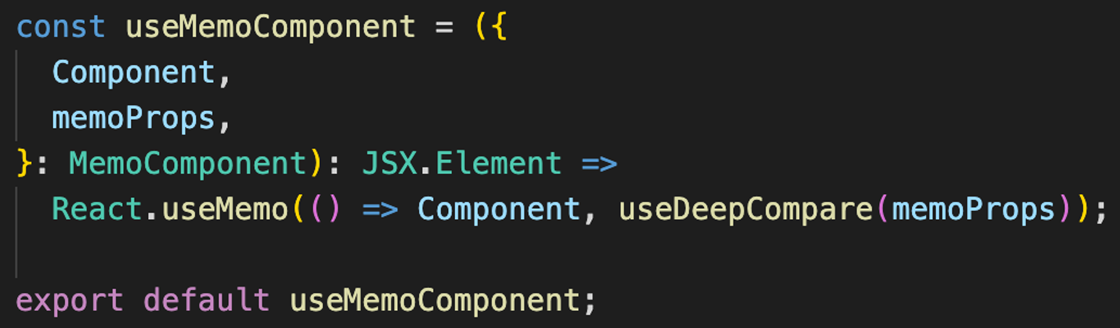
Custom hook that memoizes a component
Here, we are using the React hook useMemo, that memoizes the result of an expensive function. In that case, we are creating a function that returns the component. We also implemented a custom hook useDeepCompare to compare recursively the provided properties during the memoization. Such as the memo functions, if at least one property is updated, the component is rendered, otherwise we use the stored result from the cache.
Let’s take an example from the Resource Status page. We want to memoize the component that refreshes the resources listing and enables the auto-refresh of the listing.
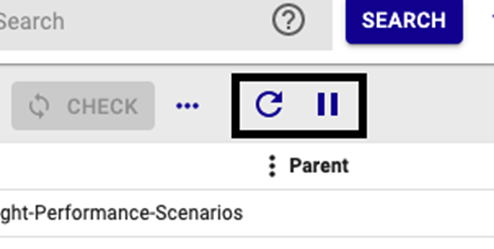
Indeed, we don’t want to render this component every time but only when the resources listing request is sent whether the auto-refresh is enabled or not, or when the selected resource is updated to refresh its own details:
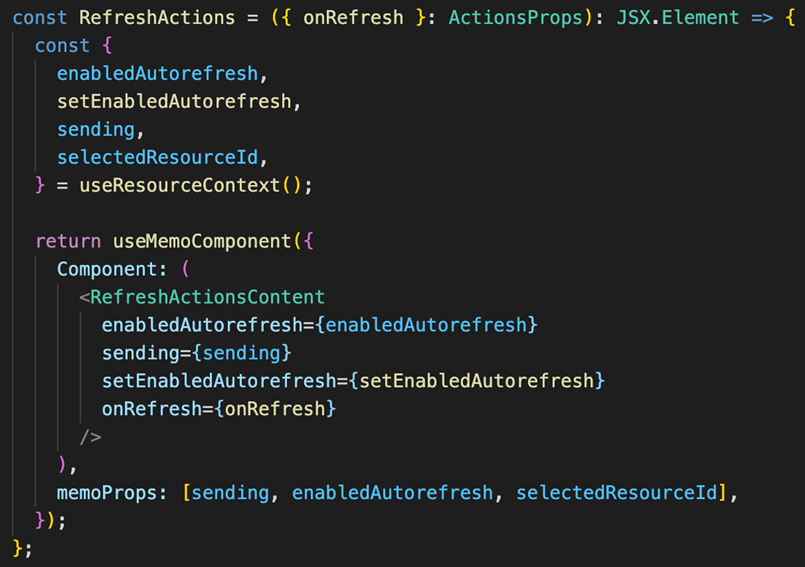
Memoized component
The component RefreshActionsContext is responsible for displaying our two buttons and memoProps is an array of values that indicates which properties trigger a render (memoization).
As you can see, the values are provided by the Context, which means that it is important to memoize the components that use a Context to avoid unnecessary renders.
If we relaunch the Profiler from React Devtools, we can see that when the resources listing is refreshed, our component RefreshActionsContent is no longer rendered with an extra annotation to indicate that the component is memoized.
Example of a memoized component
Finally, we have memoized components that use a Context and expensive components as the graphs and here is the result before / after.

Without memoization
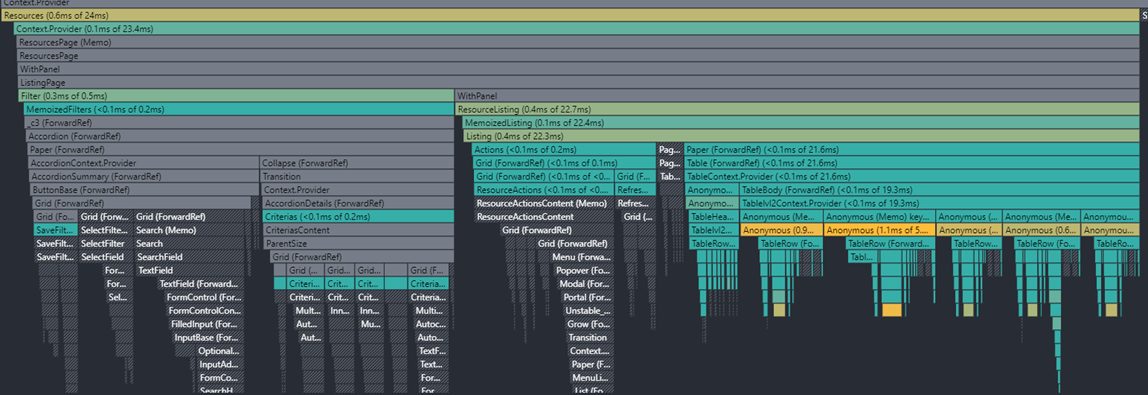
With memoization
As you can see, there are way fewer components rendered for the same action. We just render the components with a change needing to be displayed.
However, the biggest change is the overall render time for each committed render. Without memoization, this time is about 68.7 milliseconds whereas with memoization, we roughly decrease the render time to 24 milliseconds.
| Page | Percentage of render time saved |
| Resource Status | 35% |
| Host Discovery | 25% |
| Business Activities and Business Views | 60% |
This means our application is more efficient to update its own display when the user interacts with the user interface.
Conclusion
There are several ways to optimize a web application, such as refactoring parts of the code or reducing bundle sizes.You can optimize the bundle with Webpack or other bundling tools, for example.
Although more complex to implement, we chose memoization as we believe this optimization technique becomes an essential requirement in complex applications like Centreon.
Now you can enjoy improved speed in the Centreon 21.04 version, along with other great features!
We hope sharing our thinking behind improving our web application will provide helpful hints on the tools to use to improve your own web applications.
Holding a BA in Software Development and Quality, Tom dedicated most of his career to open source IT monitoring. End of 2019, he joined Centreon as a front-end engineer dedicated to the platform’s graphical interface. In this role, Tom develops new interfaces (resources status, auto-discovery, etc.) and ensures the Centreon platform performs at its peak to provide the best user experiences possible.
Share