

Laurent Pinsivy, Centreon Product Manager, worked on a step by step tutorial: how to use Centreon API Web interface?
If the video does not display, here are the steps:
Let’s say you have two Centreon platforms. The first one is your production platform while the second one is used to test new plugins or template developments.
You will frequently perform some tests, and once validated, copy your Centreon configuration from the test platform to the production platform. But how do you do this? Do you do it manually via copy and paste?
Several years ago, Centreon developed a command line API, now also available via HTTP REST JSON calls.
Rather than developing a synchronization script, Centreon now offers you a web interface built on top of this import/export API.
After installing the Centreon Api Web Import Export module on both platforms, connect to the Centreon web interface of your test platform.
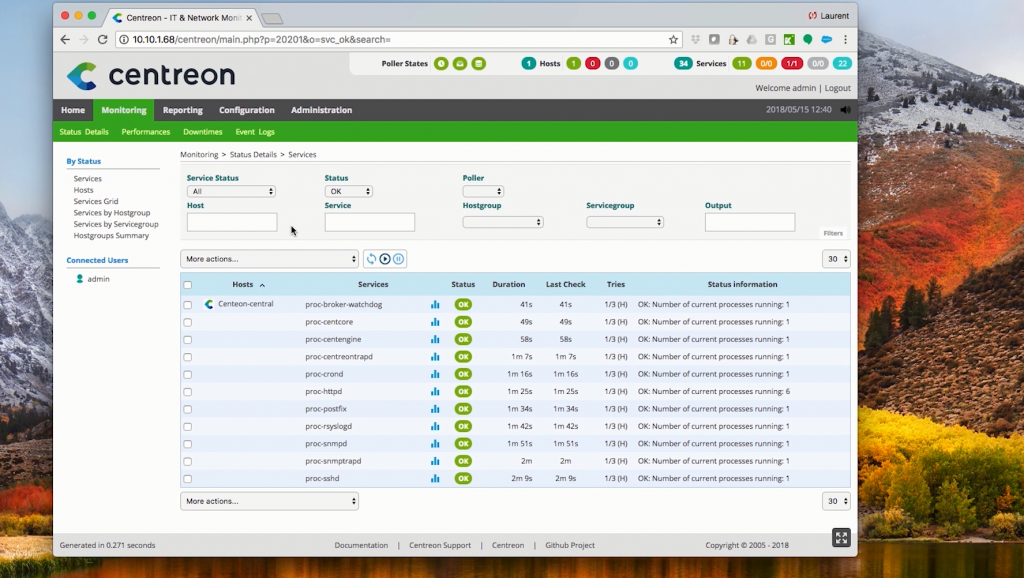
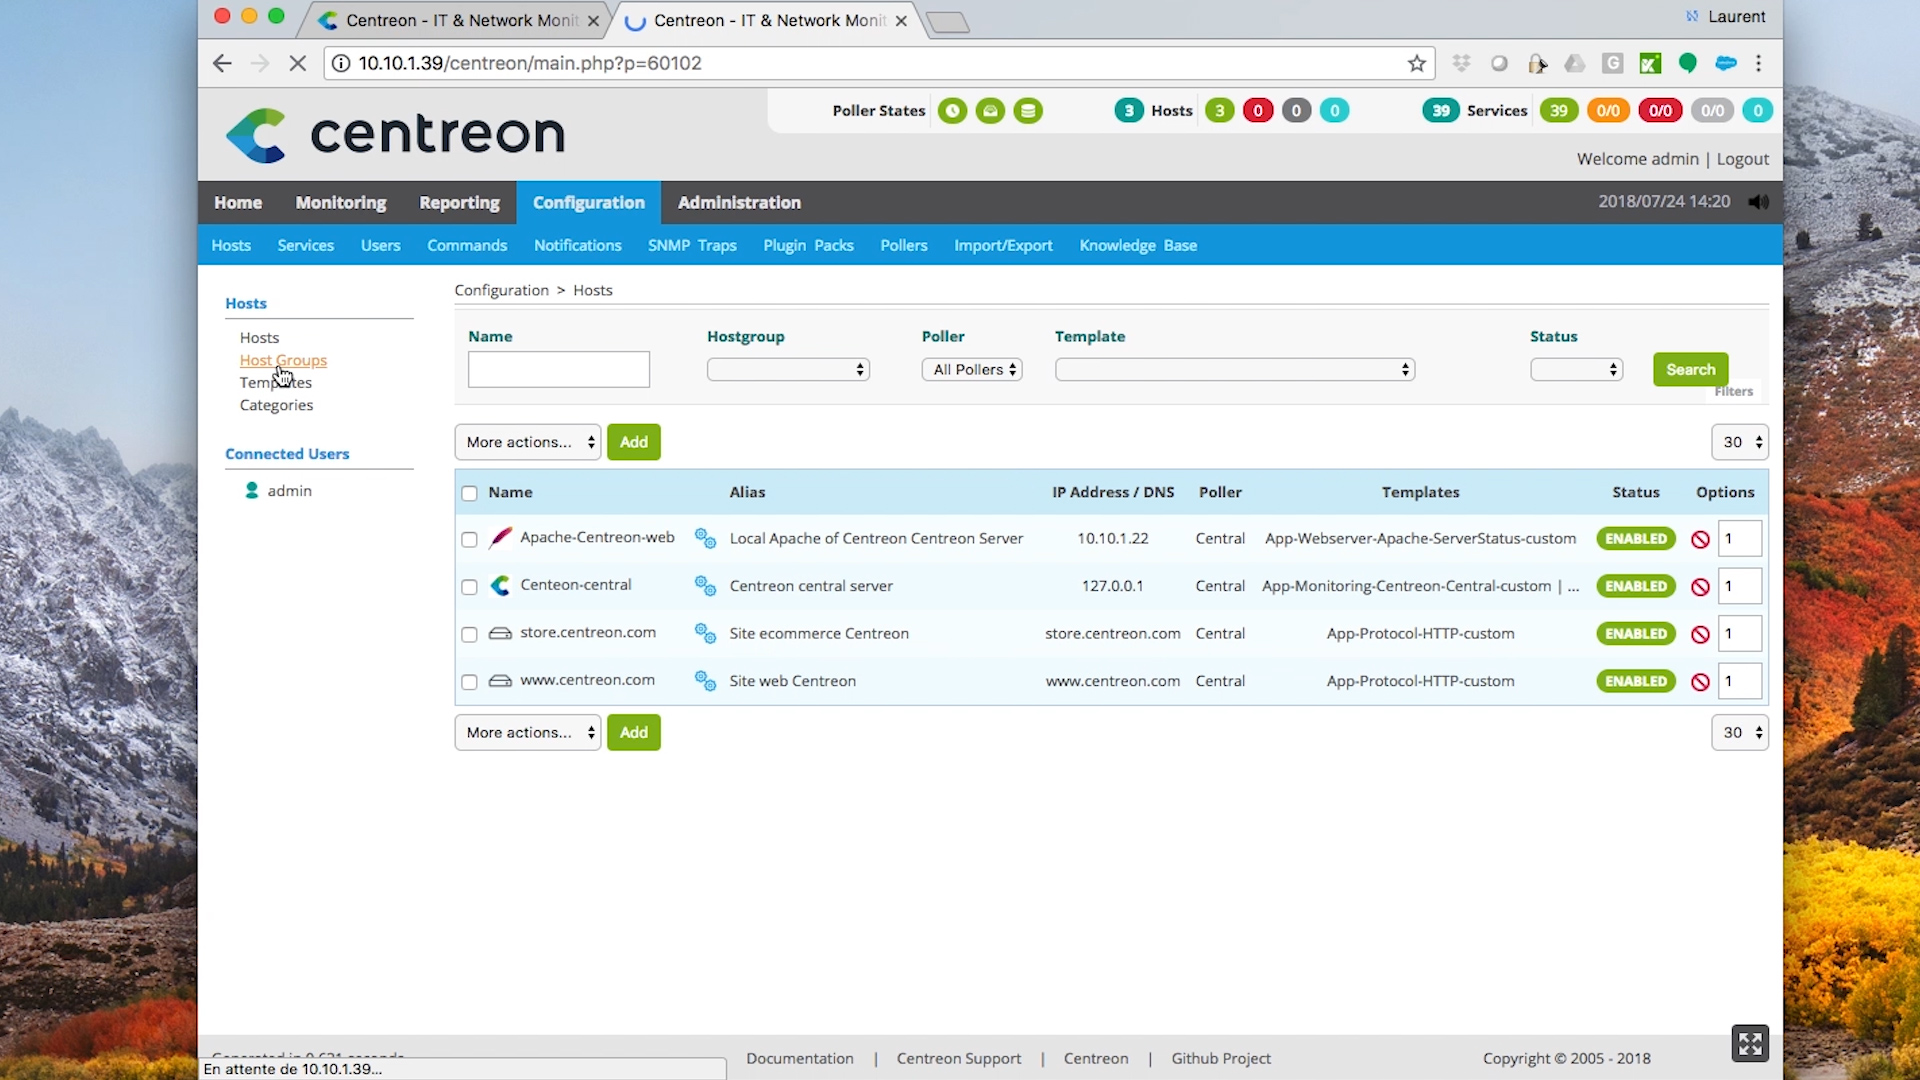
Here is a configuration to test a website. This one is functional: all services are in OK status.
The host has been added from a configuration template provided by the “HTTP Server” Plugin Pack.
A host group has also been created to group all websites together.
To export this configuration, go to the “Configuration > Import / Export” menu. Several search filters are present. For more details follow our official online documentation on documentation.centreon.com.
Here I am going to export my host store.centreon.com and its associated configuration by entering its name in the associated search filter and then clicking on the “Export” button.
The configuration is automatically downloaded by my browser, and I can now import it on my second platform.
As you can see, the production Centreon server does not yet monitor my website. And its configuration is not available yet. Neither the host group.
Let’s go to the “Configuration> Import / Export” menu, under “Import” menu, select our previously downloaded configuration and click on the “Import” button.
After import, the configuration of my host is present, as well as my host group.
Let’s build the configuration and apply it.
My website is now monitored.
Here you are, you can now easily export / import your configuration from one Centreon server to the other one.
Have fun monitoring!
Share